Booking Queue
| Feature Access | JMS > Booking > Booking Queue |
| JMS > Monitor > Status Board > Booking Queue | |
| Configuration | Admin > Global > Workflows |
Introduction
The JMS Booking workflow in ATIMS Online is a grouping of agency-defined steps used to support the processing of an inmate. The Booking workflow can only be accessed after the Intake workflow is complete and must be completed before continuing to the Assessment workflow. The Booking Queue displays all records currently being processed through the Booking Workflow.
Open the Booking Queue
To access the Booking Queue:
-
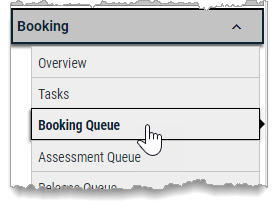
In the navigation panel, click the Expand (
 ) button to expand the Booking options.
-
Select Booking Queue. The Booking Queue page displays. This page displays all inmates who have completed Intake and are available for processing in the Booking workflow.
The Booking Queue lists the records by elapsed time since the inmate was brought into custody (Create Intake) and displays their current progress in the workflow. If a person in the queue was flagged for expedited processing, they are moved to the top of the list. Expedite rows are also sorted by elapsed time.
-
The Booking Progress grid on the left organizes the records in the workflow. Select a row to filter the information in the grid on the right.
Booking Progress Description Overall Booking Progress All inmates in the booking workflow Case Progress Each inmates’ cases are listed with individual case progress Records Check Responses Inmates whose background checks have been returned External Attachments Inmate records with external attachments -
The Tasks grid on the left only displays if there are tasks that must be completed before the Booking workflow is complete and are not workflow steps. The grid organizes the records by outstanding tasks. Select a row to filter the information in the grid on the right.
Tasks Description All Inmates All inmates with outstanding booking tasks Task 1 Inmates with Task 1 that needs to be completed Task 2 Inmates with Task 2 that needs to be completed -
To open the workflow for an inmate, click in the Booking Status column for that row, or
click Action Menu (
 ) beside the row and select the Booking Workflow option.
The system opens the first incomplete step in the workflow.
Other Options
Access Inmate Dashboard
Click the Action Menu ( ) on the row and select the Inmate Dashboard option. The Inmate Dashboard page opens to display information for the selected inmate.
Create Inmate Note
-
Click the Action Menu (
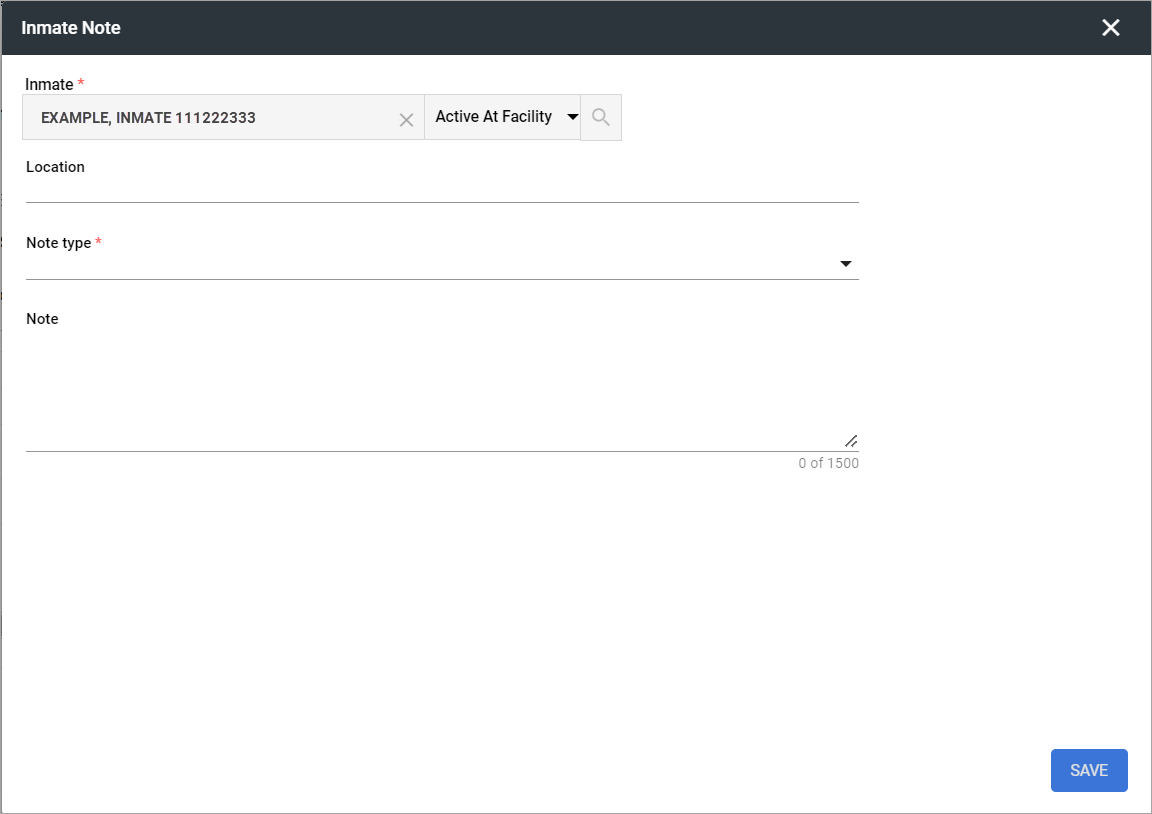
 ) on the row and select the Create New Inmate Note option. The Inmate Note Entry window opens. The Inmate Selector defaults to the current inmate.
The Inmate Note window is used to enter an inmate-specific, free text note about the inmate. It is accessed from various pages of the application and the resulting notes are available on several Viewer pages and from the Inmate Dashboard.

-
(optional) Select a Location if the note is also location-related.
-
Select a Note Type from the agency-defined list of types.
-
(optional) Enter the text of the Note. Character limit is 1500.
-
Click Save. The window closes and the note is saved.
Inmate Notes can be viewed and managed from:
-
Inmate Dashboard > Operations > Notes
-
Facility > Operations > Viewer
-
Facility > Pod Management > Viewer
Track Inmate
Click the Action Menu ( ) on the row and select the Track Inmate option. The Tracking window opens.
The system displays different options and information depending on the current location of the inmate and if they have appointments scheduled for the current date.
-
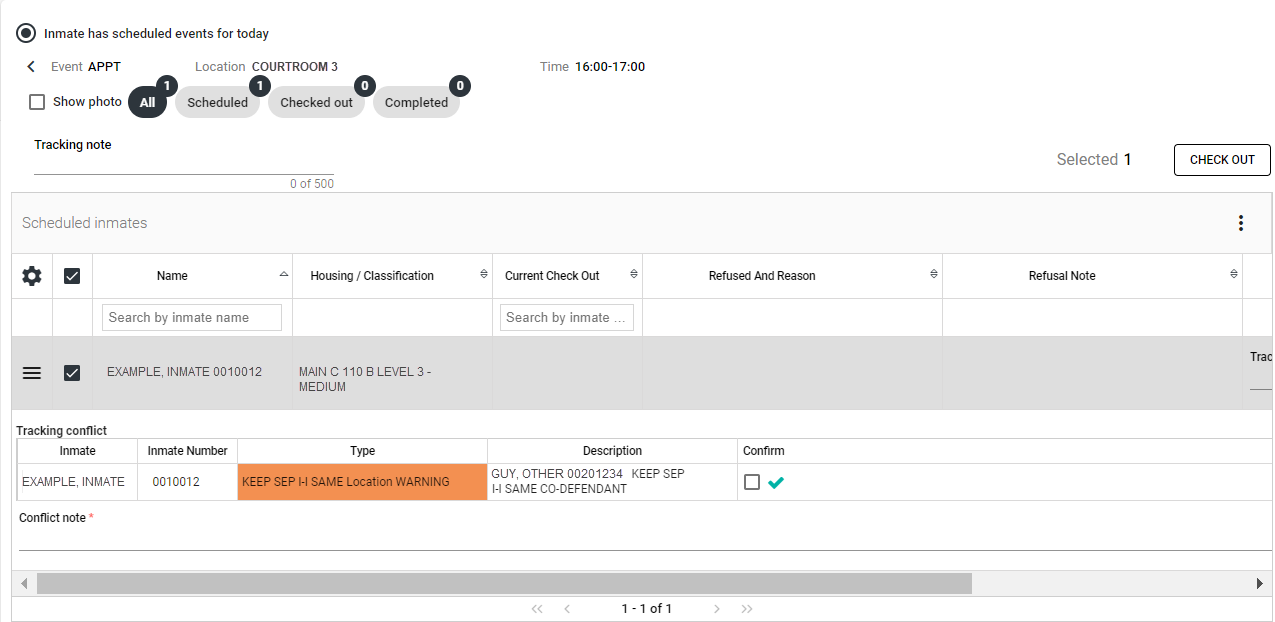
If the inmate has not been checked out to a location and has appointments scheduled for the current date, it displays with the Inmate has scheduled events for today radio button selected and lists the details of each appointment.

-
If the inmate has not been checked out to a location and does not have any appointments scheduled for the current date, it displays with the Create Unscheduled Tracking radio button selected.

-
If the inmate has been checked out to a location for either a scheduled appointment or on an unscheduled basis, it displays the current inmate location and the elapsed time they have been at the location.

Track / Check Out - Unscheduled
To track an unscheduled inmate movement:
-
Select Create unscheduled tracking.
-
Select a location from the Check Out drop-down.
The system runs conflict checks for the location (e.g. capacity) and the inmate (e.g. Keep Seps) and also checks for any conflicts with scheduled appointments. Conflicts are displayed below the Tracking Note field.
If the selected location is configured to allow an inmate to refuse the movement and to track the refusal, the Refused check box is enabled.

-
(optional) Select a Tracking reason.
-
(optional) Enter a Tracking note.
-
Confirm acceptance of any conflicts by selecting the Confirm check box for each and entering a Conflict note.
-
Click Check Out. The page refreshes to display the checkout location and elapsed time. The same information is also displayed in the location area of the Inmate Header.
To record a refusal (if available) rather than a successful check out:
-
Select the Refused check box next to the Tracking reason. A (refusal) Reason drop-down and Refused button display. The Check Out button is now hidden.
-
Select a Reason from the drop-down. This is required.
-
Click Refused. The Tracking page refreshes and the refusal is recorded in the inmate tracking history. The inmate location is NOT updated.
Track / Check Out - Scheduled
To track a scheduled inmate movement:
-
Select Inmate has scheduled events for today.
-
Click in the row for the appointment to which the inmate should be tracked. The system displays inmate and appointment details.
-
Click the check box in front of the inmate name. The system runs conflict checks for the location (e.g. capacity) and the inmate (e.g. Keep Seps) and displays any conflicts below the appointment.

-
Confirm acceptance of any conflicts by selecting the Confirm check box for each and entering a Conflict note.
-
(optional) Enter a Tracking note.
-
Click Check Out. The Tracking page refreshes to display the checkout location and elapsed time. The same information is also displayed in the location area of the Inmate Header.
To record a refusal (if available) rather than a successful check out:
-
Select the Refused check box in the appointment row. The Reason and Note fields are enabled.
-
Select a Refusal reason from the drop-down. This is required.
-
(optional) Enter a Refusal note.
-
Click Check Out. The main Tracking page displays. The refusal is recorded in the inmate tracking history. The inmate location is NOT changed.
Track / Move to New Location
To track an inmate movement from one location to another:
-
Select Move Inmate from the Select a Location drop-down. The page refreshes to display Move location drop-down along with a Tracking reason and Tracking note field.
-
Select a location from the Move location drop-down.
-
(optional) Select a Tracking reason.
-
(optional) Enter a Tracking note.
-
Click Move. The Tracking page refreshes to display the new location and reset the elapsed time. The same information is also updated in the location area of the Inmate Header.
To record a refusal (if available) rather than a successful move:
-
Select the Refused check box next to the Tracking reason. A (refusal) Reason drop-down and Refused button display. The Move button is now hidden.
-
Select a Reason from the drop-down. This is required.
-
Click Refused. The Tracking page refreshes and the refusal is recorded in the inmate tracking history. The inmate location is NOT updated.
View Tracking History
To view the history of an inmate's movements to and from locations:
-
Click the expand arrow (
 ) for the Tracking History section.
The section expands to display tracking records for the inmate's current incarceration.
 -
To view the full tracking history for the inmate, or records for a different incarceration, select from the Tracking History drop-down list.
If the inmates is currently checked out to a location, the row displays highlighted in blue.
![]()